Multi-container applicationsマルチコンテナアプリケーション
Explanation説明
Starting up a single-container application is easy. For example, a Python script that performs a specific data processing task runs within a container with all its dependencies. Similarly, a Node.js application serving a static website with a small API endpoint can be effectively containerized with all its necessary libraries and dependencies. However, as applications grow in size, managing them as individual containers becomes more difficult.シングルコンテナアプリケーションの起動は簡単です。たとえば、特定のデータ処理タスクを実行するPythonスクリプトは、その依存関係すべてを含むコンテナ内で実行されます。同様に、小さなAPIエンドポイントを持つ静的ウェブサイトを提供するNode.jsアプリケーションも、必要なライブラリと依存関係をすべて含めて効果的にコンテナ化できます。しかし、アプリケーションが大きくなるにつれて、個々のコンテナとして管理することが難しくなります。
Imagine the data processing Python script needs to connect to a database. Suddenly, you're now managing not just the script but also a database server within the same container. If the script requires user logins, you'll need an authentication mechanism, further bloating the container size.データ処理のPythonスクリプトがデータベースに接続する必要があると想像してみてください。突然、スクリプトだけでなく、同じコンテナ内でデータベースサーバーも管理することになります。スクリプトがユーザーログインを必要とする場合、認証メカニズムが必要になり、コンテナのサイズがさらに膨らみます。
One best practice for containers is that each container should do one thing and do it well. While there are exceptions to this rule, avoid the tendency to have one container do multiple things.コンテナに関するベストプラクティスの一つは、各コンテナが一つのことを行い、それをうまく行うべきだということです。このルールには例外がありますが、一つのコンテナで複数のことを行う傾向を避けるべきです。
Now you might ask, "Do I need to run these containers separately? If I run them separately, how shall I connect them all together?"さて、あなたはこう尋ねるかもしれません。「これらのコンテナを別々に実行する必要がありますか?別々に実行する場合、どのようにすべてを接続すればよいですか?」
While docker run is a convenient tool for launching containers, it becomes difficult to manage a growing application stack with it. Here's why:コンテナを起動するための便利なツールであるdocker runですが、成長するアプリケーションスタックを管理するのは難しくなります。その理由は次のとおりです:
- Imagine running several
docker runcommands (frontend, backend, and database) with different configurations for development, testing, and production environments. It's error-prone and time-consuming.開発、テスト、プロダクション環境の異なる構成で、複数のdocker runコマンド(フロントエンド、バックエンド、データベース)を実行することを想像してみてください。これはエラーが発生しやすく、時間がかかります。 - Applications often rely on each other. Manually starting containers in a specific order and managing network connections become difficult as the stack expands.アプリケーションはしばしば互いに依存しています。スタックが拡張するにつれて、特定の順序でコンテナを手動で起動し、ネットワーク接続を管理することが難しくなります。
- Each application needs its
docker runcommand, making it difficult to scale individual services. Scaling the entire application means potentially wasting resources on components that don't need a boost.各アプリケーションにはそれぞれのdocker runコマンドが必要であり、個々のサービスをスケールすることが難しくなります。アプリケーション全体をスケールすることは、必要のないコンポーネントにリソースを無駄にする可能性があります。 - Persisting data for each application requires separate volume mounts or configurations within each
docker runcommand. This creates a scattered data management approach.各アプリケーションのデータを永続化するには、各docker runコマンド内で別々のボリュームマウントや設定が必要です。これにより、データ管理が散発的になります。 - Setting environment variables for each application through separate
docker runcommands is tedious and error-prone.各アプリケーションのために別々のdocker runコマンドを通じて環境変数を設定するのは面倒で、エラーが発生しやすいです。
That's where Docker Compose comes to the rescue.そこで、Docker Composeが登場します。
Docker Compose defines your entire multi-container application in a single YAML file called compose.yml. This file specifies configurations for all your containers, their dependencies, environment variables, and even volumes and networks. With Docker Compose:Docker Composeは、compose.yml と呼ばれる単一のYAMLファイルで、あなたの全てのマルチコンテナアプリケーションを定義します。このファイルは、すべてのコンテナの設定、依存関係、環境変数、さらにはボリュームやネットワークを指定します。Docker Composeを使用すると、
- You don't need to run multiple
docker runcommands. All you need to do is define your entire multi-container application in a single YAML file. This centralizes configuration and simplifies management.複数のdocker runコマンドを実行する必要はありません。必要なのは、単一のYAMLファイルで全てのマルチコンテナアプリケーションを定義することだけです。これにより、設定が集中化され、管理が簡素化されます。 - You can run containers in a specific order and manage network connections easily.特定の順序でコンテナを実行し、ネットワーク接続を簡単に管理できます。
- You can simply scale individual services up or down within the multi-container setup. This allows for efficient allocation based on real-time needs.マルチコンテナセットアップ内で、個々のサービスを簡単にスケールアップまたはスケールダウンできます。これにより、リアルタイムのニーズに基づいて効率的にリソースを割り当てることができます。
- You can implement persistent volumes with ease.永続ボリュームを簡単に実装できます。
- It's easy to set environment variables once in your Docker Compose file.Docker Composeファイルで一度環境変数を設定するのは簡単です。
By leveraging Docker Compose for running multi-container setups, you can build complex applications with modularity, scalability, and consistency at their core.Docker Composeを活用してマルチコンテナセットアップを実行することで、モジュール性、スケーラビリティ、一貫性を核とした複雑なアプリケーションを構築できます。
Try it out試してみる
In this hands-on guide, you'll first see how to build and run a counter web application based on Node.js, an Nginx reverse proxy, and a Redis database using the docker run commands. You’ll also see how you can simplify the entire deployment process using Docker Compose.このハンズオンガイドでは、まずNode.js、Nginxリバースプロキシ、Redisデータベースに基づいたカウンターWebアプリケーションを構築し、docker runコマンドを使用して実行する方法を見ていきます。また、Docker Composeを使用して全体のデプロイメントプロセスを簡素化する方法も紹介します。
Set upセットアップ
Get the sample application. If you have Git, you can clone the repository for the sample application. Otherwise, you can download the sample application. Choose one of the following options.サンプルアプリケーションを取得します。Gitがあれば、サンプルアプリケーションのリポジトリをクローンできます。そうでない場合は、サンプルアプリケーションをダウンロードできます。次のオプションのいずれかを選択してください。
Use the following command in a terminal to clone the sample application repository.ターミナルで次のコマンドを使用して、サンプルアプリケーションのリポジトリをクローンします。
$ git clone https://github.com/dockersamples/nginx-node-redisNavigate into the
nginx-node-redisdirectory:nginx-node-redisディレクトリに移動します:$ cd nginx-node-redisInside this directory, you'll find two sub-directories -
nginxandweb.このディレクトリ内には、nginxとwebの2つのサブディレクトリがあります。Download the source and extract it.ソースをダウンロードして解凍します。
Navigate into the
nginx-node-redis-maindirectory:nginx-node-redis-mainディレクトリに移動します:$ cd nginx-node-redis-mainInside this directory, you'll find two sub-directories -
nginxandweb.このディレクトリ内には、nginxとwebの2つのサブディレクトリがあります。Download and install Docker Desktop.Docker Desktopをダウンロードしてインストールします。
Build the imagesイメージをビルドする
Navigate into the
nginxdirectory to build the image by running the following command:nginxディレクトリに移動して、次のコマンドを実行してイメージをビルドします:$ docker build -t nginx .Navigate into the
webdirectory and run the following command to build the first web image:webディレクトリに移動し、次のコマンドを実行して最初のウェブイメージをビルドします:$ docker build -t web .
Run the containersコンテナを実行する
Before you can run a multi-container application, you need to create a network for them all to communicate through. You can do so using the
docker network createcommand:マルチコンテナアプリケーションを実行する前に、すべてのコンテナが通信するためのネットワークを作成する必要があります。これを行うには、docker network createコマンドを使用します:$ docker network create sample-appStart the Redis container by running the following command, which will attach it to the previously created network and create a network alias (useful for DNS lookups):次のコマンドを実行してRedisコンテナを起動します。これにより、以前に作成したネットワークに接続され、ネットワークエイリアスが作成されます(DNSルックアップに便利です):
$ docker run -d --name redis --network sample-app --network-alias redis redisStart the first web container by running the following command:次のコマンドを実行して最初のウェブコンテナを起動します:
$ docker run -d --name web1 -h web1 --network sample-app --network-alias web1 webStart the second web container by running the following:次のコマンドを実行して2番目のウェブコンテナを起動します:
$ docker run -d --name web2 -h web2 --network sample-app --network-alias web2 webStart the Nginx container by running the following command:次のコマンドを実行してNginxコンテナを起動します:
$ docker run -d --name nginx --network sample-app -p 80:80 nginxNoteNginx is typically used as a reverse proxy for web applications, routing traffic to backend servers. In this case, it routes to the Node.js backend containers (web1 or web2).Nginxは通常、ウェブアプリケーションのリバースプロキシとして使用され、トラフィックをバックエンドサーバーにルーティングします。この場合、Node.jsバックエンドコンテナ(web1またはweb2)にルーティングします。
Verify the containers are up by running the following command:コンテナが起動していることを確認するには、次のコマンドを実行します:
$ docker psYou will see output like the following:次のような出力が表示されます:
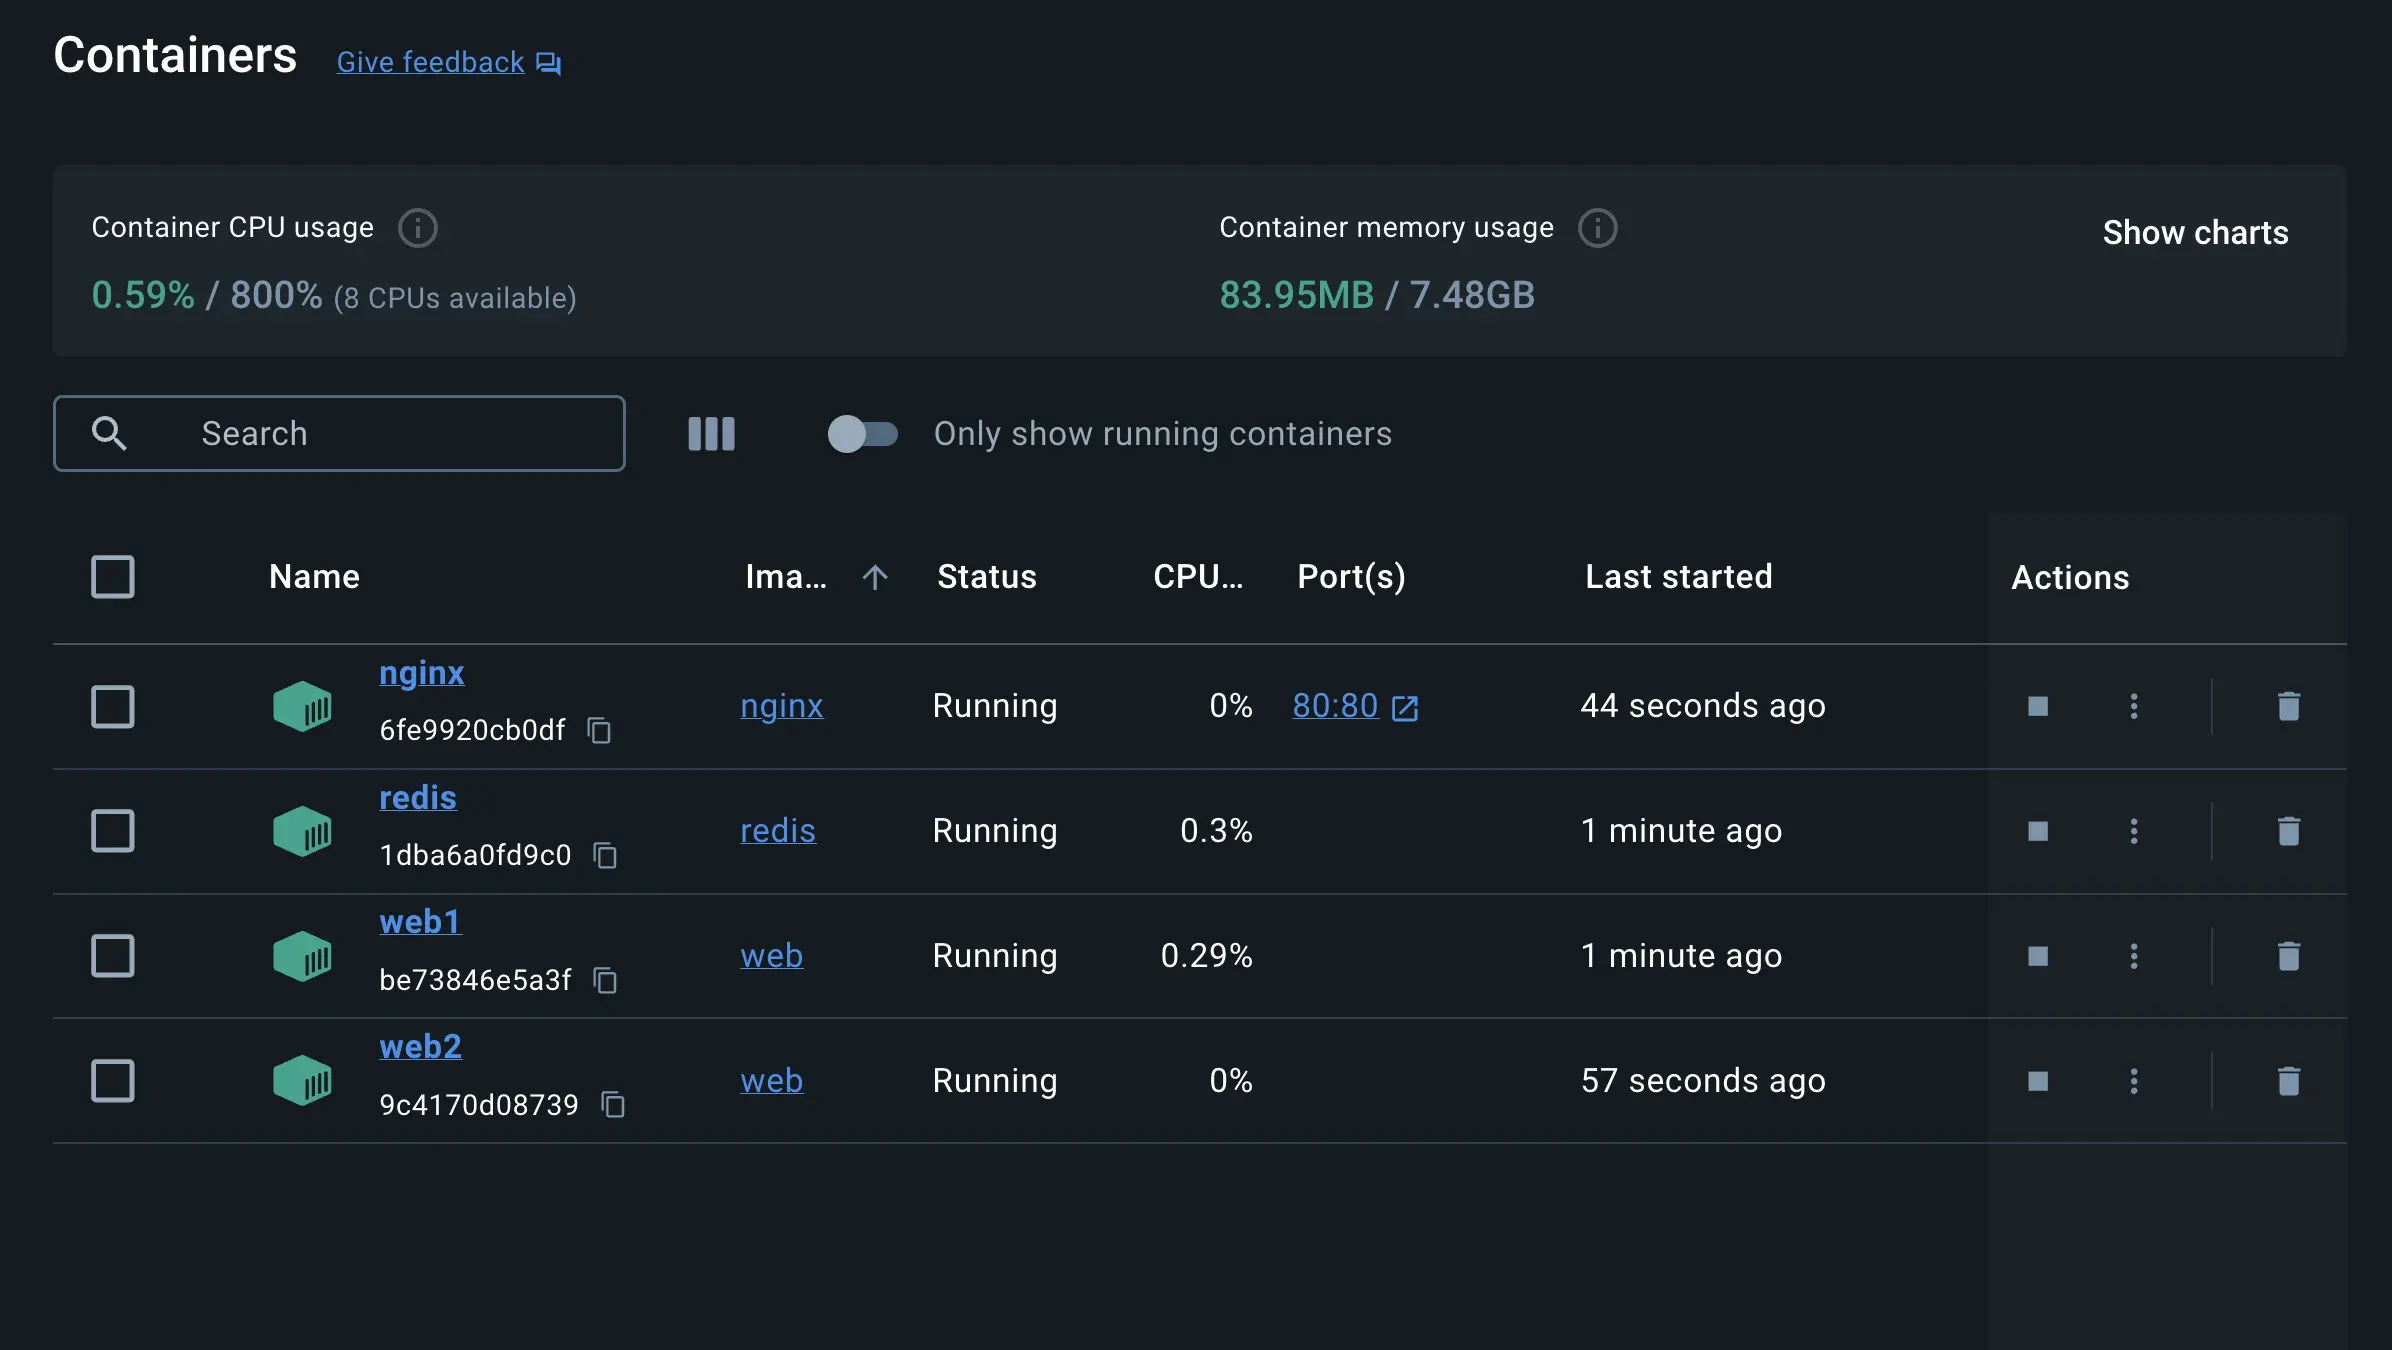
CONTAINER ID   IMAGE     COMMAND                  CREATED              STATUS              PORTS                NAMES
2cf7c484c144   nginx     "/docker-entrypoint.…"   9 seconds ago        Up 8 seconds        0.0.0.0:80->80/tcp   nginx
7a070c9ffeaa   web       "docker-entrypoint.s…"   19 seconds ago       Up 18 seconds                            web2
6dc6d4e60aaf   web       "docker-entrypoint.s…"   34 seconds ago       Up 33 seconds                            web1
008e0ecf4f36   redis     "docker-entrypoint.s…"   About a minute ago   Up About a minute   6379/tcp             redis
If you look at the Docker Desktop Dashboard, you can see the containers and dive deeper into their configuration.Docker Desktop Dashboardを見ると、コンテナを確認し、その設定を詳しく見ることができます。
With everything up and running, you can open http://localhost in your browser to see the site. Refresh the page several times to see the host that’s handling the request and the total number of requests:すべてが起動しているので、ブラウザで http://localhost を開いてサイトを確認できます。ページを何度かリフレッシュして、リクエストを処理しているホストとリクエストの総数を確認してください:
web2: Number of visits is: 9 web1: Number of visits is: 10 web2: Number of visits is: 11 web1: Number of visits is: 12NoteYou might have noticed that Nginx, acting as a reverse proxy, likely distributes incoming requests in a round-robin fashion between the two backend containers. This means each request might be directed to a different container (web1 and web2) on a rotating basis. The output shows consecutive increments for both the web1 and web2 containers and the actual counter value stored in Redis is updated only after the response is sent back to the client.Nginxがリバースプロキシとして機能し、2つのバックエンドコンテナ間で受信リクエストをラウンドロビン方式で分配していることに気づいたかもしれません。これは、各リクエストが回転的に異なるコンテナ(web1とweb2)に送信される可能性があることを意味します。出力は、web1とweb2の両方のコンテナに対して連続的な増加を示し、Redisに保存されている実際のカウンタ値は、クライアントに応答が返された後にのみ更新されます。
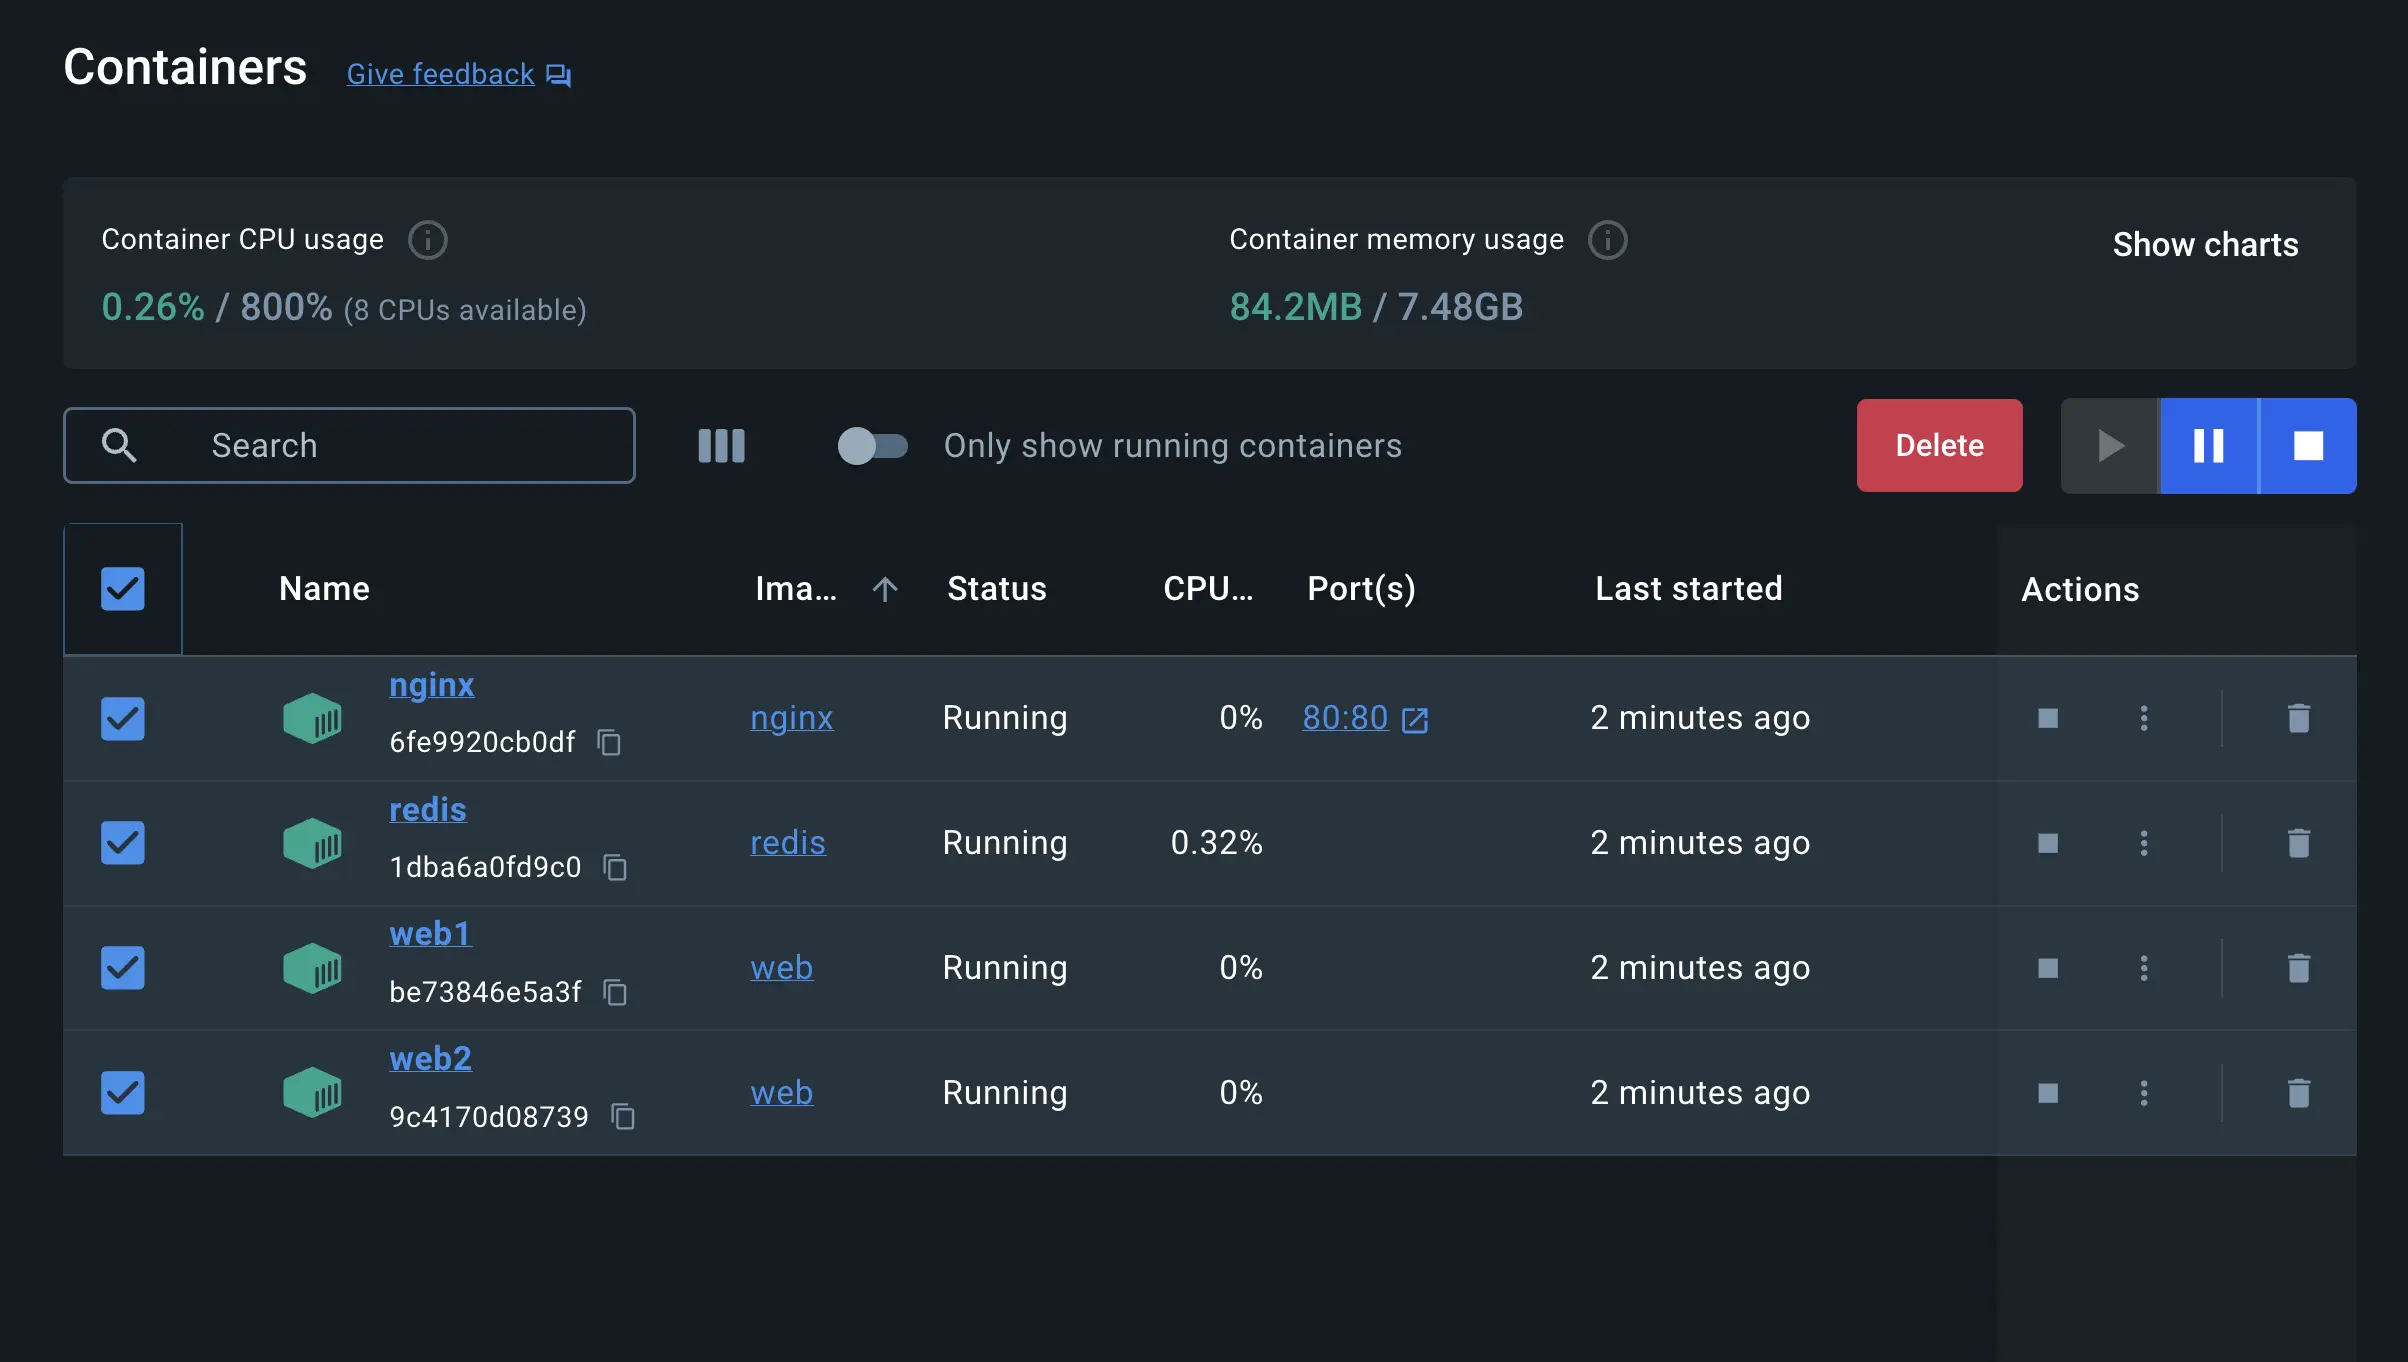
You can use the Docker Desktop Dashboard to remove the containers by selecting the containers and selecting the Delete button.Docker Desktop Dashboardを使用して、コンテナを選択し、削除ボタンを選択することで、コンテナを削除できます。
Simplify the deployment using Docker ComposeDocker Composeを使用してデプロイメントを簡素化する
Docker Compose provides a structured and streamlined approach for managing multi-container deployments. As stated earlier, with Docker Compose, you don’t need to run multiple docker run commands. All you need to do is define your entire multi-container application in a single YAML file called compose.yml. Let’s see how it works.Docker Composeは、マルチコンテナデプロイメントを管理するための構造化された効率的なアプローチを提供します。前述のように、Docker Composeを使用すると、複数の docker run コマンドを実行する必要はありません。必要なのは、compose.yml という単一のYAMLファイルにマルチコンテナアプリケーション全体を定義することだけです。どのように機能するか見てみましょう。
Navigate to the root of the project directory. Inside this directory, you'll find a file named compose.yml. This YAML file is where all the magic happens. It defines all the services that make up your application, along with their configurations. Each service specifies its image, ports, volumes, networks, and any other settings necessary for its functionality.プロジェクトディレクトリのルートに移動します。このディレクトリ内には、compose.yml という名前のファイルがあります。このYAMLファイルがすべての魔法が起こる場所です。アプリケーションを構成するすべてのサービスとその設定を定義します。各サービスは、そのイメージ、ポート、ボリューム、ネットワーク、および機能に必要なその他の設定を指定します。
Use the
docker compose upcommand to start the application:docker compose upコマンドを使用してアプリケーションを起動します:$ docker compose up -d --buildWhen you run this command, you should see output similar to the following:このコマンドを実行すると、次のような出力が表示されるはずです。
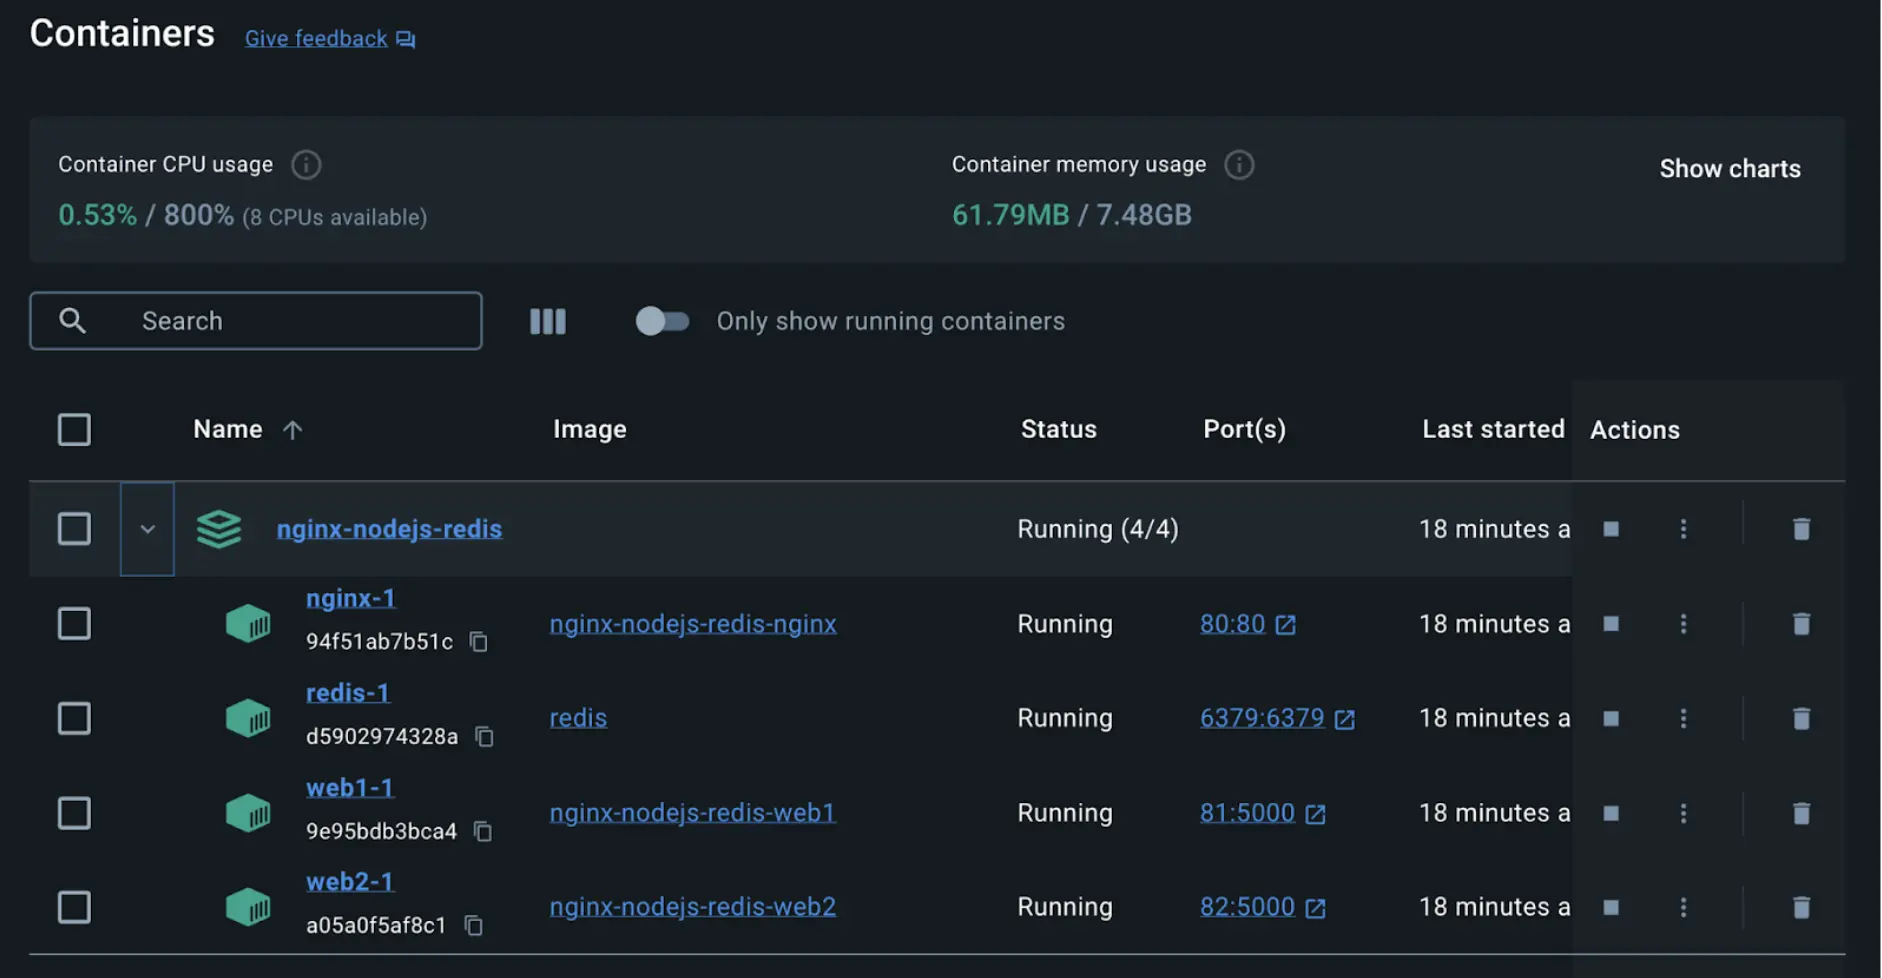
Running 5/5
✔ Network nginx-nodejs-redis_default    Created                                                0.0s
✔ Container nginx-nodejs-redis-web1-1   Started                                                0.1s
✔ Container nginx-nodejs-redis-redis-1  Started                                                0.1s
✔ Container nginx-nodejs-redis-web2-1   Started                                                0.1s
✔ Container nginx-nodejs-redis-nginx-1  Started
If you look at the Docker Desktop Dashboard, you can see the containers and dive deeper into their configuration.Docker Desktop Dashboardを見ると、コンテナを確認し、その設定を詳しく見ることができます。
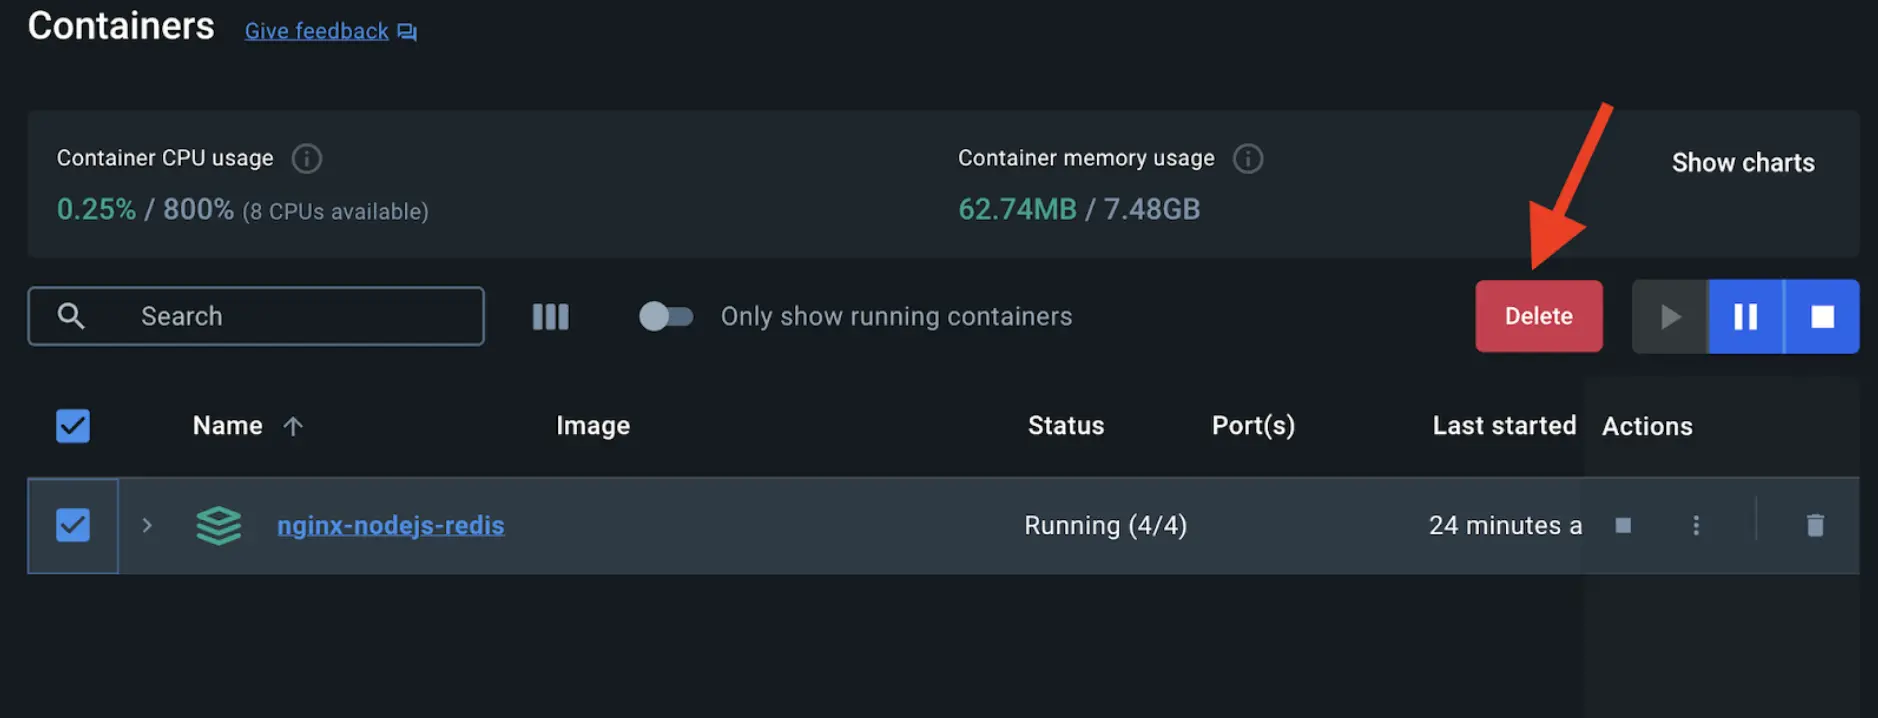
Alternatively, you can use the Docker Desktop Dashboard to remove the containers by selecting the application stack and selecting the Delete button.また、Docker Desktop Dashboardを使用して、アプリケーションスタックを選択し、削除ボタンを選択することでコンテナを削除することもできます。
In this guide, you learned how easy it is to use Docker Compose to start and stop a multi-container application compared to docker run which is error-prone and difficult to manage.このガイドでは、docker runと比較して、Docker Composeを使用してマルチコンテナアプリケーションを簡単に起動および停止できることを学びました。これはエラーが発生しやすく、管理が難しいです。