Publishing and exposing portsポートの公開と露出
Explanation説明
If you've been following the guides so far, you understand that containers provide isolated processes for each component of your application. Each component - a React frontend, a Python API, and a Postgres database - runs in its own sandbox environment, completely isolated from everything else on your host machine. This isolation is great for security and managing dependencies, but it also means you can’t access them directly. For example, you can’t access the web app in your browser.これまでのガイドに従っていれば、コンテナがアプリケーションの各コンポーネントに対して隔離されたプロセスを提供することを理解しているでしょう。各コンポーネント - Reactフロントエンド、Python API、Postgresデータベース - は、ホストマシンの他のすべてから完全に隔離された独自のサンドボックス環境で実行されます。この隔離はセキュリティと依存関係の管理に優れていますが、直接アクセスできないことも意味します。例えば、ブラウザでウェブアプリにアクセスすることはできません。
That’s where port publishing comes in.そこでポートの公開が登場します。
Publishing portsポートの公開
Publishing a port provides the ability to break through a little bit of networking isolation by setting up a forwarding rule. As an example, you can indicate that requests on your host’s port 8080 should be forwarded to the container’s port 80. Publishing ports happens during container creation using the -p (or --publish) flag with docker run. The syntax is:ポートを公開することで、転送ルールを設定することによって、ネットワークの隔離を少し突破することができます。例えば、ホストのポート 8080 へのリクエストをコンテナのポート 80 に転送するように指定できます。ポートの公開は、docker run の -p (または --publish) フラグを使用してコンテナ作成時に行われます。構文は次の通りです:
$ docker run -d -p HOST_PORT:CONTAINER_PORT nginx
HOST_PORT: The port number on your host machine where you want to receive trafficHOST_PORT: トラフィックを受信したいホストマシン上のポート番号CONTAINER_PORT: The port number within the container that's listening for connectionsCONTAINER_PORT: 接続を待機しているコンテナ内のポート番号
For example, to publish the container's port 80 to host port 8080:例えば、コンテナのポート 80 をホストポート 8080 に公開するには:
$ docker run -d -p 8080:80 nginx
Now, any traffic sent to port 8080 on your host machine will be forwarded to port 80 within the container.これで、ホストマシンのポート 8080 に送信されたトラフィックは、コンテナ内のポート 80 に転送されます。
ImportantWhen a port is published, it's published to all network interfaces by default. This means any traffic that reaches your machine can access the published application. Be mindful of publishing databases or any sensitive information. Learn more about published ports here.ポートが公開されると、デフォルトで全てのネットワークインターフェースに公開されます。これは、あなたのマシンに到達するトラフィックが公開されたアプリケーションにアクセスできることを意味します。データベースや機密情報を公開する際には注意が必要です。 公開ポートについて詳しくはこちら。
Publishing to ephemeral portsエフェメラルポートへの公開
At times, you may want to simply publish the port but don’t care which host port is used. In these cases, you can let Docker pick the port for you. To do so, simply omit the HOST_PORT configuration.時には、単にポートを公開したいだけで、どのホストポートが使用されるかは気にしない場合があります。このような場合、Dockerにポートを選ばせることができます。そのためには、HOST_PORT の設定を省略するだけです。
For example, the following command will publish the container’s port 80 onto an ephemeral port on the host:例えば、次のコマンドはコンテナのポート 80 をホストのエフェメラルポートに公開します:
$ docker run -p 80 nginx
Once the container is running, using docker ps will show you the port that was chosen:コンテナが実行中になると、docker ps を使用すると選択されたポートが表示されます:
docker ps
CONTAINER ID   IMAGE         COMMAND                  CREATED          STATUS          PORTS                    NAMES
a527355c9c53   nginx         "/docker-entrypoint.…"   4 seconds ago    Up 3 seconds    0.0.0.0:54772->80/tcp    romantic_williamson
In this example, the app is exposed on the host at port 54772.この例では、アプリはホストのポート 54772 で公開されています。
Publishing all portsすべてのポートを公開する
When creating a container image, the EXPOSE instruction is used to indicate the packaged application will use the specified port. These ports aren't published by default.コンテナイメージを作成する際、EXPOSE 命令はパッケージ化されたアプリケーションが指定されたポートを使用することを示すために使用されます。これらのポートはデフォルトでは公開されません。
With the -P or --publish-all flag, you can automatically publish all exposed ports to ephemeral ports. This is quite useful when you’re trying to avoid port conflicts in development or testing environments.-P または --publish-all フラグを使用すると、すべての公開されたポートをエフェメラルポートに自動的に公開できます。これは、開発やテスト環境でポートの競合を避ける際に非常に便利です。
For example, the following command will publish all of the exposed ports configured by the image:例えば、以下のコマンドはイメージによって設定されたすべての公開ポートを公開します:
$ docker run -P nginx
Try it out試してみる
In this hands-on guide, you'll learn how to publish container ports using both the CLI and Docker Compose for deploying a web application.このハンズオンガイドでは、CLIとDocker Composeの両方を使用して、ウェブアプリケーションをデプロイするためのコンテナポートの公開方法を学びます。
Use the Docker CLIDocker CLIを使用する
In this step, you will run a container and publish its port using the Docker CLI.このステップでは、コンテナを実行し、Docker CLIを使用してそのポートを公開します。
Download and install Docker Desktop.Docker Desktopをダウンロードしてインストールします。
In a terminal, run the following command to start a new container:ターミナルで、次のコマンドを実行して新しいコンテナを起動します:
$ docker run -d -p 8080:80 docker/welcome-to-dockerThe first
8080refers to the host port. This is the port on your local machine that will be used to access the application running inside the container. The second80refers to the container port. This is the port that the application inside the container listens on for incoming connections. Hence, the command binds to port8080of the host to port80on the container system.最初の8080はホストポートを指します。これは、コンテナ内で実行されているアプリケーションにアクセスするためにローカルマシンで使用されるポートです。2番目の80はコンテナポートを指します。これは、コンテナ内のアプリケーションが受信接続をリッスンするポートです。したがって、このコマンドはホストのポート8080をコンテナシステムのポート80にバインドします。Verify the published port by going to the Containers view of the Docker Desktop Dashboard.Docker Desktop Dashboardのコンテナビューに移動して、公開されたポートを確認してください。
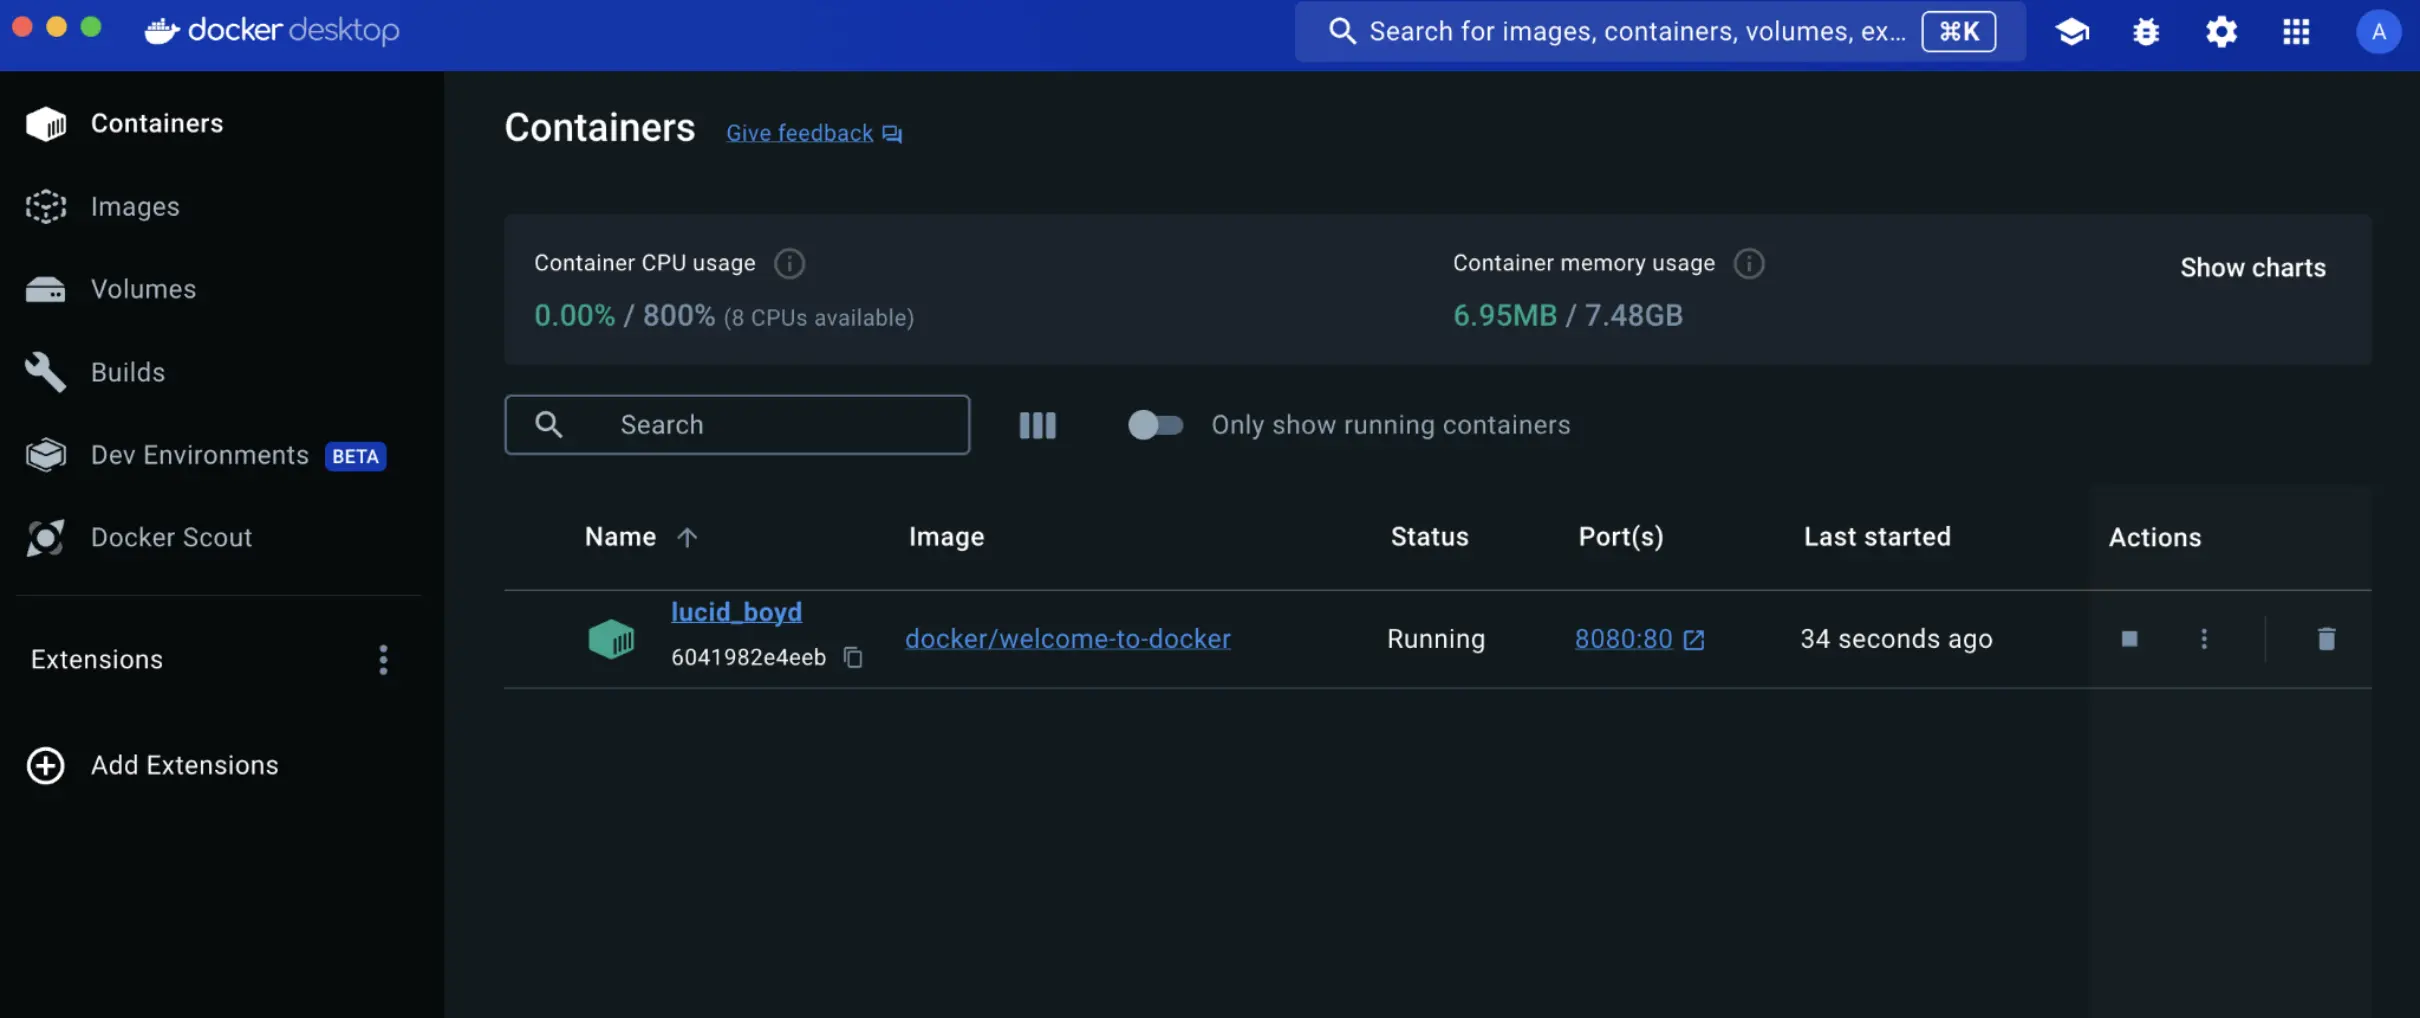
Open the website by either selecting the link in the Port(s) column of your container or visiting http://localhost:8080 in your browser.コンテナのPort(s)列にあるリンクを選択するか、ブラウザでhttp://localhost:8080にアクセスして、ウェブサイトを開いてください。

Use Docker ComposeDocker Composeを使用する
This example will launch the same application using Docker Compose:この例では、Docker Composeを使用して同じアプリケーションを起動します:
Create a new directory and inside that directory, create a
compose.yamlfile with the following contents:新しいディレクトリを作成し、そのディレクトリ内に次の内容を持つcompose.yamlファイルを作成します:services: app: image: docker/welcome-to-docker ports: - 8080:80The
portsconfiguration accepts a few different forms of syntax for the port definition. In this case, you’re using the sameHOST_PORT:CONTAINER_PORTused in thedocker runcommand.ports構成は、ポート定義のためのいくつかの異なる構文形式を受け入れます。この場合、docker runコマンドで使用されるのと同じHOST_PORT:CONTAINER_PORTを使用しています。Open a terminal and navigate to the directory you created in the previous step.ターミナルを開き、前のステップで作成したディレクトリに移動します。
Use the
docker compose upcommand to start the application.docker compose upコマンドを使用してアプリケーションを起動します。Open your browser to http://localhost:8080.ブラウザを開いてhttp://localhost:8080にアクセスします。
Additional resources追加リソース
If you’d like to dive in deeper on this topic, be sure to check out the following resources:このトピックについてさらに深く掘り下げたい場合は、以下のリソースをぜひチェックしてください:
Next steps次のステップ
Now that you understand how to publish and expose ports, you're ready to learn how to override the container defaults using the docker run command.ポートを公開してエクスポートする方法を理解したので、docker runコマンドを使用してコンテナのデフォルト設定をオーバーライドする方法を学ぶ準備ができました。